
Managing Arpio users in your organization
Jump to:
Creating and managing users
Resetting Your Password
Managing SSO users
Creating and managing users
After setting up your initial application in Arpio, it's easy to add more users to your Arpio account.
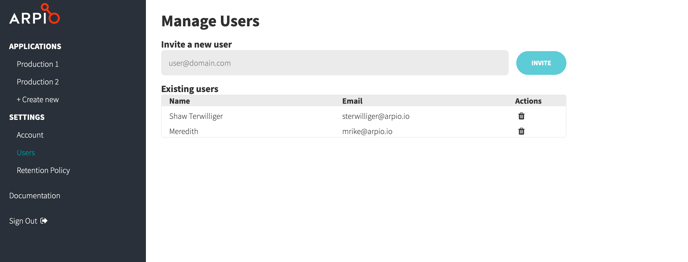
To create additional users in Arpio, log in to the Arpio console, and navigate to Users in the sidebar. You will be directed to the Manage Users page.
Enter the email of your user in the field entitled Invite a new user and click Invite. The new user will receive an invitation email at the address provided with a link to set up their account.
You can send a new invitation by navigating to the invited user's name in the Existing Users table on the Manage Users page, and clicking the envelope icon in the Actions column. Each invitation link is valid for 7 days.
To remove a user from the system, click the trash can icon adjacent to their name in the Actions column of the Existing Users table.
Resetting Your Password
If you would like to reset your existing password to the Arpio console, click the Sign Out button in the left sidebar navigation. Once signed out, you can follow the Forgot Your Password link to send a password reset request to the email associated with your Arpio account.

Managing SSO users
Arpio supports single sign-on for Identity Providers that use Security Assertion Markup Language 2.0 (SAML 2.0). An overview of our SSO support is here.
To get started managing SSO users in Arpio, make sure you have configured your identity provider appropriately. Okta, Google , and Azure AD are our documented providers, but any IDP that supports SAML 2.0 is supported. Find details on adding another Identity Provider here. Once configuration is complete, you can use your identity provider to manage access to Arpio.
To add new SSO users in Arpio:
- Navigate to the Users page in the sidebar navigation of the Arpio Console.
- Add the new user’s email address in the designated field under Invite a new user. The UI will default to selecting your identity provider, but this can be changed in the dropdown menu. Click Invite to send an invitation to the user email address provided.
- Invited users will receive an email to login to Arpio. Following the link in the email should log invited users in automatically.
After you have invited SSO users, you can navigate to the Users page in the Arpio Console and delete any non-SSO users in your account by clicking on the trash can icon adjacent to their entry in the Users table. Non-SSO users will have "Arpio" listed as their Identity Provider.
If you want to be able to login directly (e.g. in case of Identity Provider downtime), we recommend creating and maintaining one or two Arpio logins. You can use email addresses that are NOT connected to individual users, for example admins@mycompany.com.