If a disaster ever strikes, it's important to be able to quickly recover your applications in your recovery environment. Arpio makes this fast by fully automating the recovery process. In this article, we will walk through how to perform a recovery with Arpio.
Launch the Recovery
You launch a recovery by clicking the "Launch Recovery" button.

Choose Applications To Recover
The "Launch recovery for" dialog appears next. You can launch a recovery of a single application or many applications as long as they share the same primary environment and the same recovery environment. If you need to recover applications in different environments, you can launch them separately.
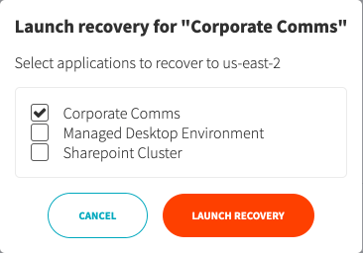
Select the applications you'd like to recover, review the available options (described below), and then click the "Launch Recovery" button.
Point-in-time-recovery
Arpio allows you to choose the latest recovery point, or select a recovery point from any previous point-in-time with the scope of your configured retention policies.

Enabling Ransomware Recovery
Check Enable Ransomware Recovery to recover Amazon EC2 instances that could contain malware in a quarantine configuration, so they can't make any network connections or be contacted over the network. You can unquarantine individual resources later after they've been inspected. See the Automated Ransomware Recovery article for more information.
Arpio Updates the Recovery Environment
Arpio will now re-configure the recovery environment by applying the latest recovery point. In most cases, the latest recovery point was already applied, but AWS resources that cost money were not created. This time, those resources will be created, resulting in a fully-functional environment.
Instantiating resources takes a few minutes, depending on how long it takes AWS to boot any servers or recover any databases. You can monitor progress in the Arpio console, or you can log into the AWS console to see additional details.
The UI updates once everything has been setup.

Move Production Traffic
You now have your recovery environment running. You can perform any validation you deem necessary before updating your DNS entries to transition your production traffic to this environment. Arpio presents important details of resources such as DNS names and IP addresses so that you can easily update DNS.

For more details on how to update your production DNS, see the blog post, Failover Routing for Disaster Recovery.
Perform a Failback
Most users choose to restore service to their primary environment after a disaster event has concluded. When you are ready, Arpio makes it possible to perform an automated failback of your data. Simply click the "Failback" button for the application In Recovery, and follow the prompts.

For more details on Arpio's failback capability, see our Performing a Failback documentation.
Conclude Recovery
When you no longer need the recovery environment, click the "Conclude Recovery" button to turn it down.

Complete the dialog by selecting applications that should be concluded.
If you recovered multiple applications, you can conclude their recoveries separately (if desired).
Once you conclude the recovery, Arpio will turn down AWS resources that cost money and update other resources to the latest recovery point. Your recovery environment will be ready for re-use in the future.